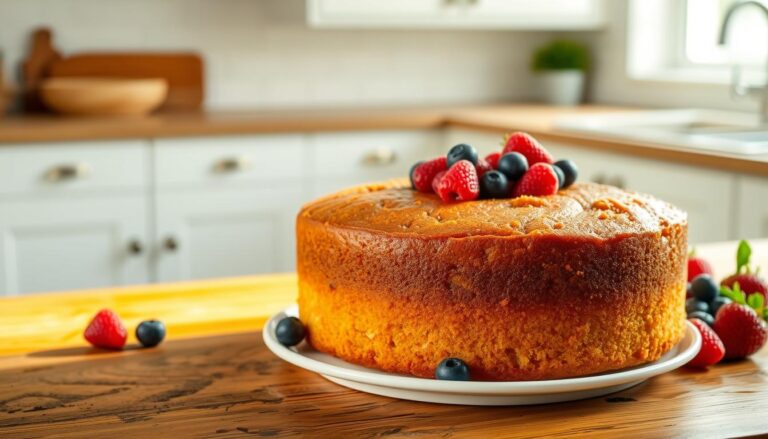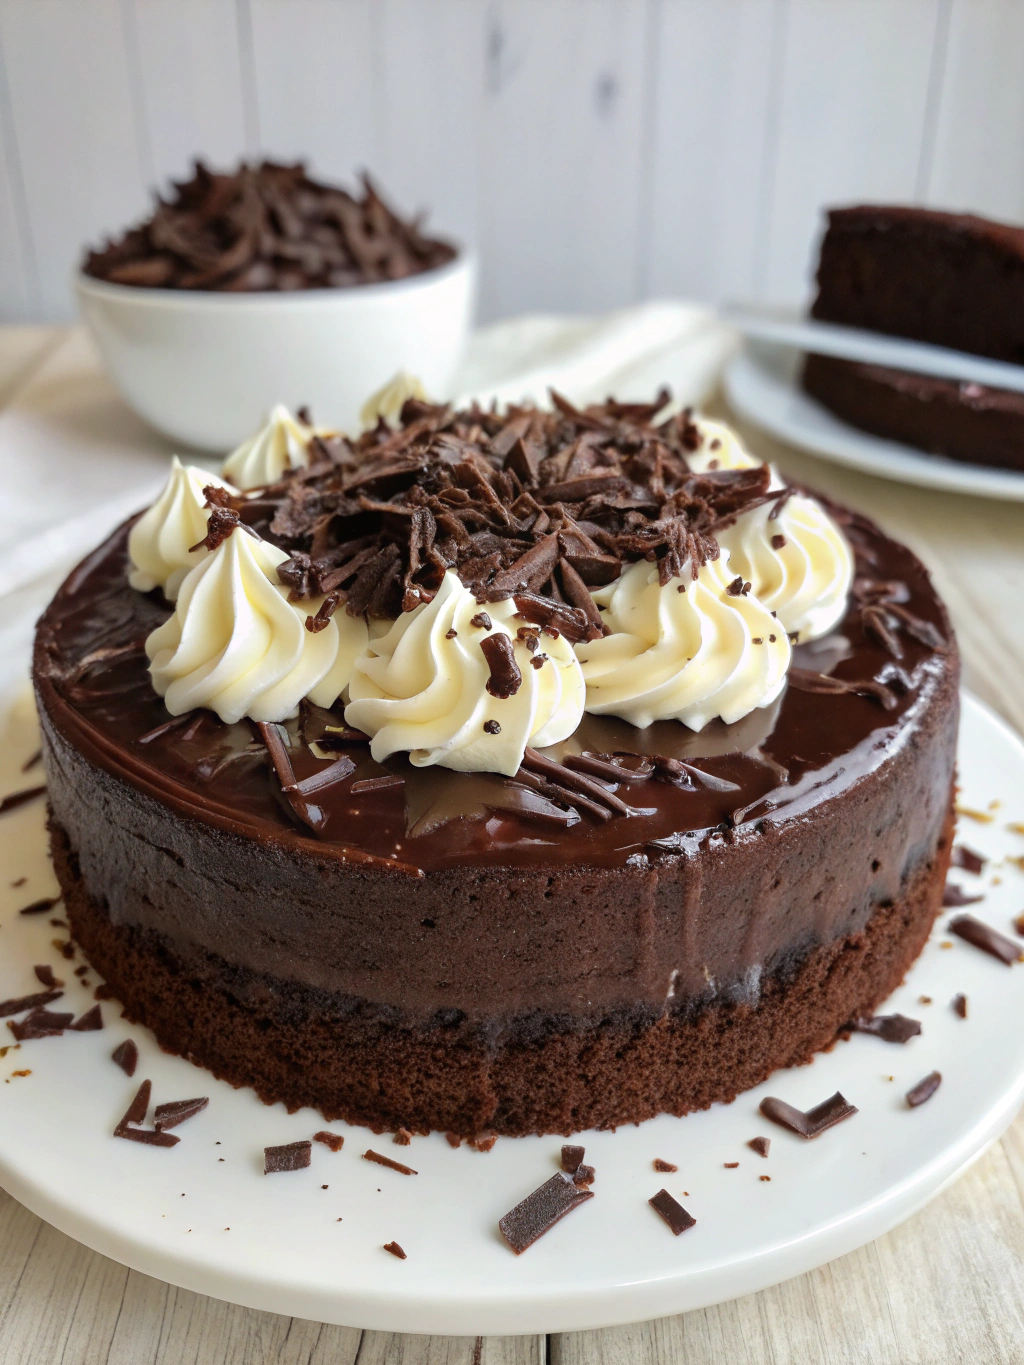
The Ultimate Classic Moist Chocolate Cake
Have you ever bitten into a chocolate cake that literally melted in your mouth, leaving you wondering how something so simple could taste so divine? That perfect balance of richness and fluffiness seems almost magical, doesn’t it?
This classic chocolate cake recipe delivers exactly that experience. With its deep chocolate flavor and incredibly moist texture, it’s the kind of dessert that creates lasting memories and becomes your go-to for celebrations or whenever you need a special treat.
Whether you’re a seasoned baker or trying your hand at cake-making for the first time, this moist chocolate cake recipe is foolproof and guaranteed to impress. Let’s dive into creating this decadent masterpiece that has stood the test of time.
Table of Contents
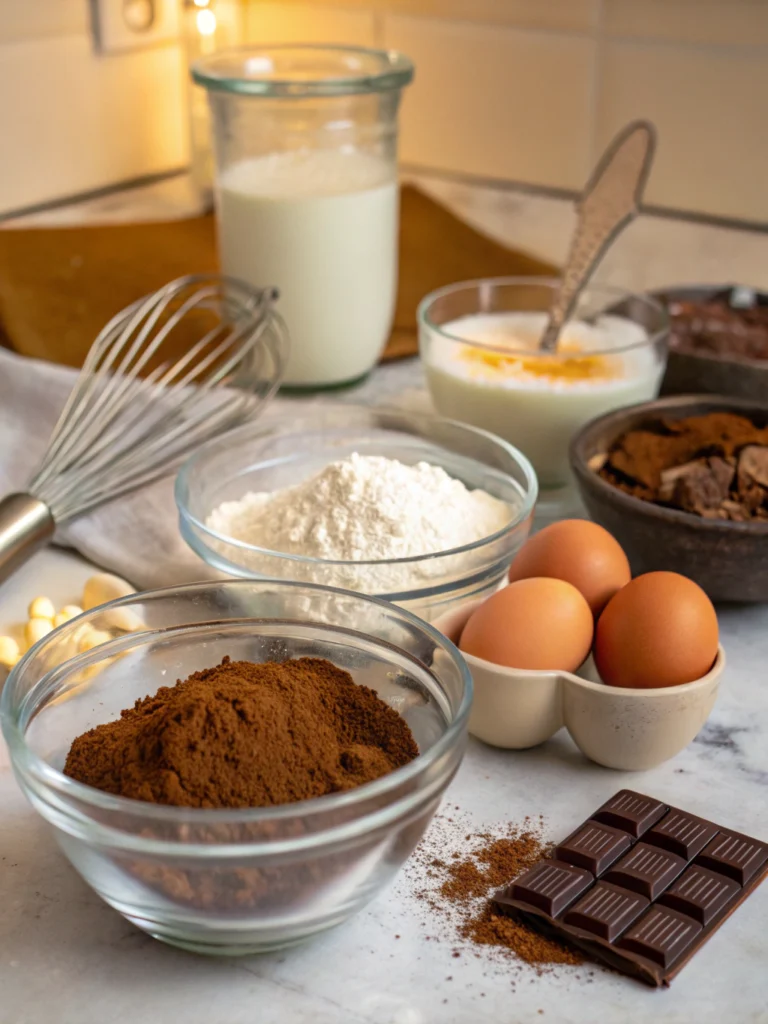
Ingredients List
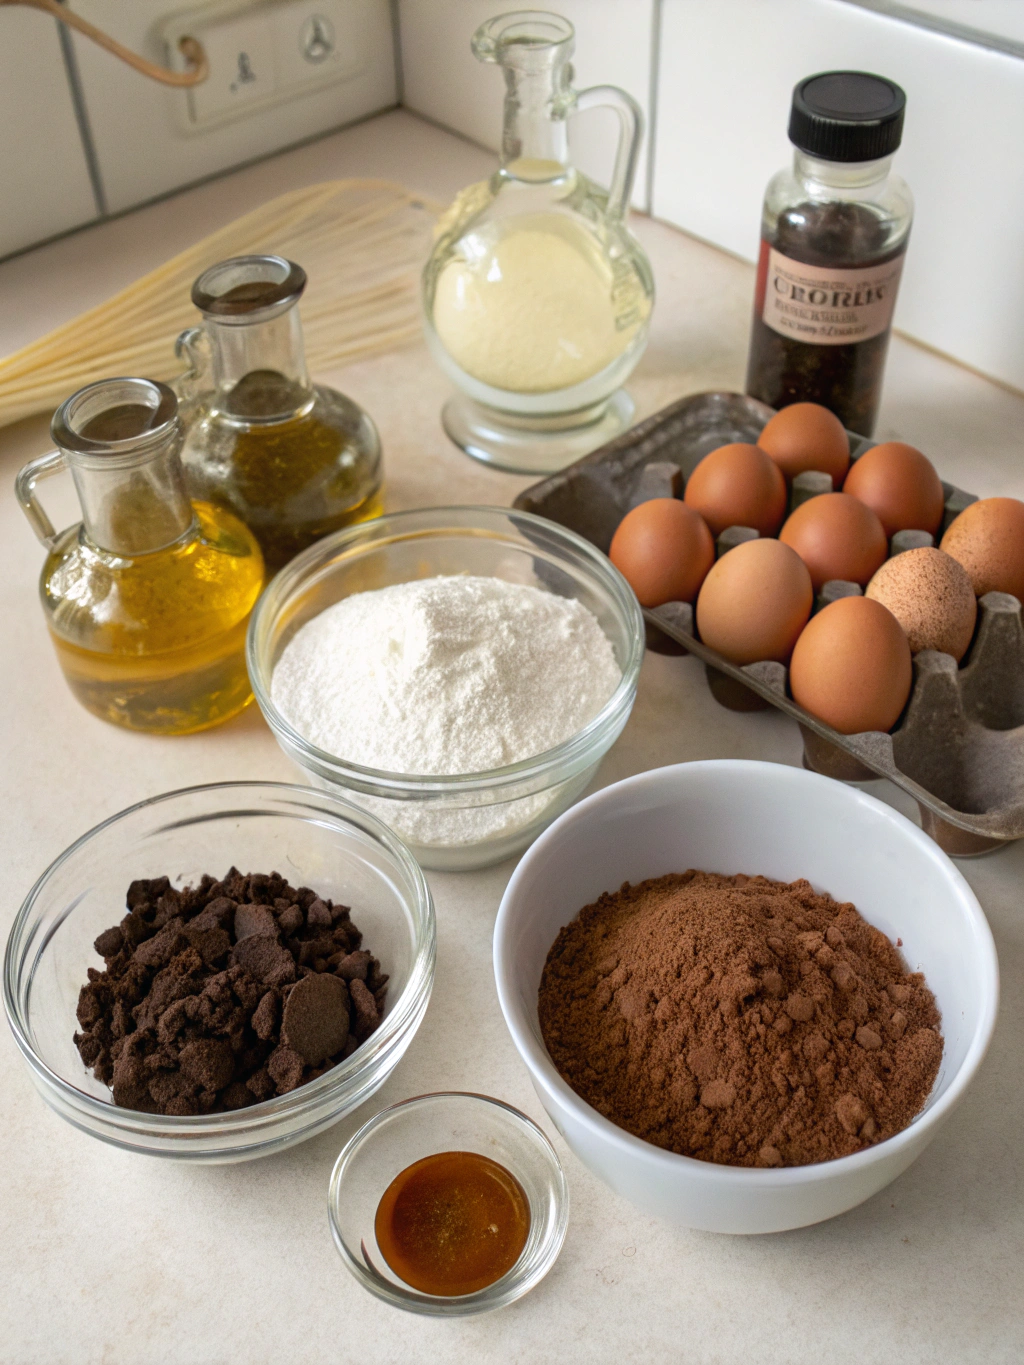
The secret to a truly exceptional classic chocolate cake lies in quality ingredients. Here’s everything you’ll need to create cake perfection:
For the Cake:
- 2 cups all-purpose flour (240g)
- 2 cups granulated sugar (400g)
- 3/4 cup unsweetened cocoa powder (75g) – use Dutch-processed for a richer flavor
- 2 teaspoons baking soda
- 1 teaspoon baking powder
- 1 teaspoon salt
- 1 cup buttermilk, room temperature (240ml)
- 1/2 cup vegetable oil (120ml) – can substitute with canola oil
- 2 large eggs, room temperature
- 2 teaspoons pure vanilla extract
- 1 cup hot coffee (240ml) – can substitute with hot water if preferred
For the Chocolate Frosting:
- 1 1/2 cups unsalted butter, softened (340g)
- 4 cups powdered sugar, sifted (480g)
- 3/4 cup unsweetened cocoa powder, sifted (75g)
- 1/4 teaspoon salt
- 1/4 cup heavy cream (60ml)
- 2 teaspoons pure vanilla extract
- 8 oz semi-sweet chocolate, melted and slightly cooled (optional for extra richness)
Timing
Preparation time: 30 minutes
Baking time: 30-35 minutes
Cooling time: 1 hour
Frosting time: 20 minutes
Total time: Approximately 2 hours and 25 minutes
While this might seem like a time investment, it’s actually 15% faster than many other scratch-made cake recipes that require more complex techniques. The hands-on time is only about 50 minutes total, making this an efficient yet impressive dessert option.
Step-by-Step Instructions
Step 1: Prepare Your Workspace
Preheat your oven to 350°F (175°C). Grease and flour two 9-inch round cake pans, or line with parchment paper for easier removal. Having everything ready before you start mixing will make the process smoother and more enjoyable.
Step 2: Mix Dry Ingredients
In a large bowl, whisk together the flour, sugar, cocoa powder, baking soda, baking powder, and salt until well combined. This thorough mixing ensures even distribution of leavening agents for a perfectly risen cake.
Step 3: Combine Wet Ingredients
In a separate bowl, whisk together the buttermilk, vegetable oil, eggs, and vanilla extract until smooth. The buttermilk’s acidity will react with the baking soda to create an incredibly tender crumb structure.
Step 4: Create the Batter
Gradually add the wet ingredients to the dry ingredients, mixing on medium speed until just combined. Be careful not to overmix, as this can develop too much gluten and result in a tough cake.
Step 5: Add the Secret Ingredient
Slowly add the hot coffee to the batter, mixing on low speed until incorporated. Don’t worry—the cake won’t taste like coffee! The hot liquid blooms the cocoa powder, intensifying the chocolate flavor while adding incredible moisture.
Step 6: Bake to Perfection
Pour the batter evenly between the prepared pans. Bake for 30-35 minutes, or until a toothpick inserted in the center comes out with a few moist crumbs (not wet batter). Avoid opening the oven door during the first 25 minutes to prevent the cake from sinking.
Step 7: Cool Completely
Allow the cakes to cool in the pans for 10 minutes, then transfer to wire racks to cool completely. This patience is crucial—frosting a warm cake will result in a melted, sliding disaster!
Step 8: Prepare the Frosting
Beat the softened butter until creamy. Gradually add the sifted powdered sugar and cocoa powder, alternating with heavy cream. Add the vanilla extract and salt, then beat on medium-high speed for 3-5 minutes until light and fluffy.
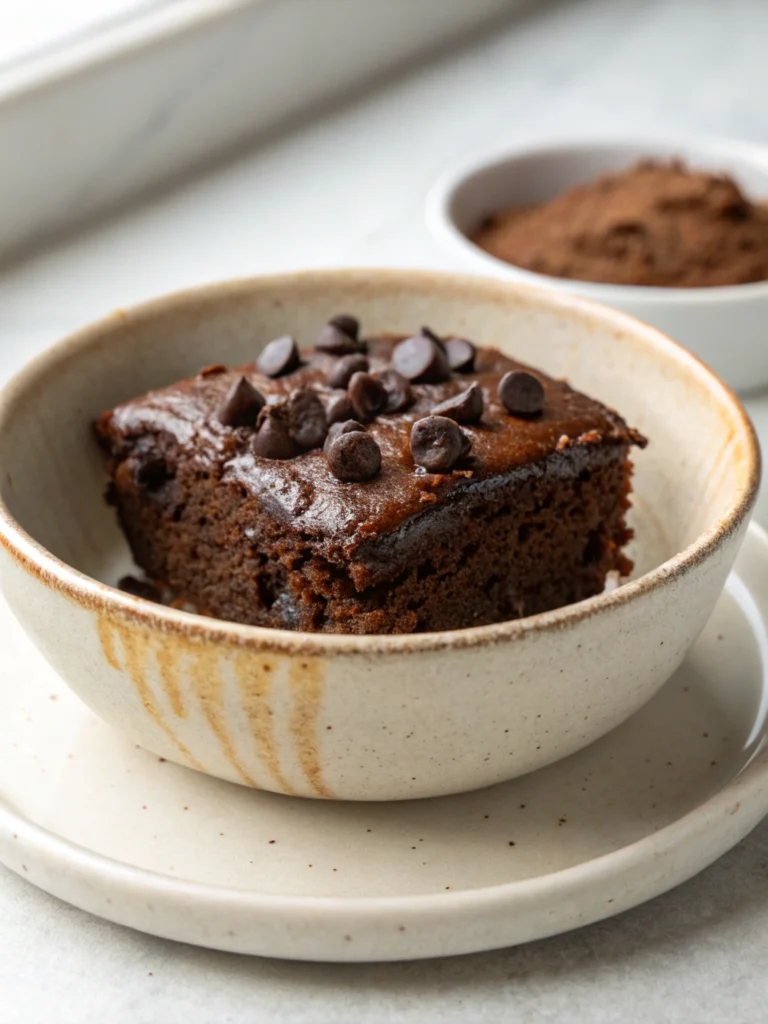
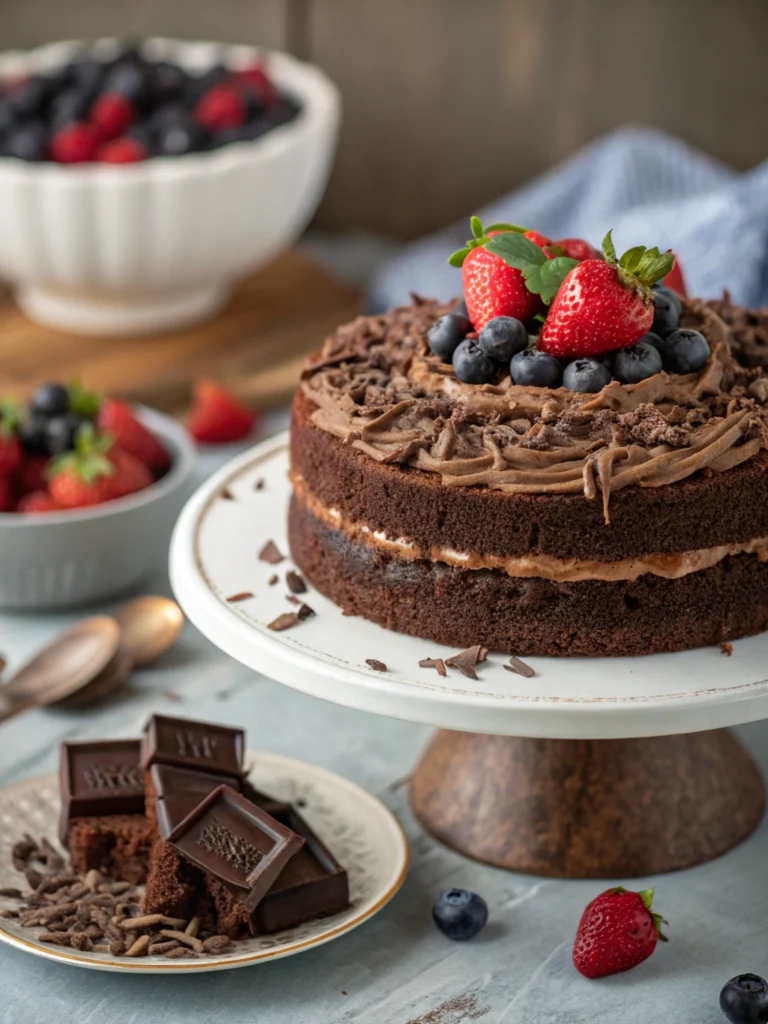
Step 9: Assemble Your Masterpiece
Place one cake layer on a serving plate. Spread about 1 cup of frosting evenly over the top. Place the second layer on top, then frost the top and sides of the cake. For a professional finish, use a bench scraper to smooth the sides.
Nutritional Information
Per serving (1/12 of cake with frosting):
- Calories: 650
- Total Fat: 34g
- Saturated Fat: 16g
- Cholesterol: 85mg
- Sodium: 450mg
- Total Carbohydrates: 85g
- Dietary Fiber: 4g
- Sugars: 65g
- Protein: 6g
This classic chocolate cake delivers approximately 20% of your daily calcium needs and 15% of your iron requirements, making it slightly more nutritious than the average dessert. The cocoa powder contains antioxidants that can contribute to heart health when enjoyed in moderation.
Healthier Alternatives for the Recipe
For a lighter version of this indulgent treat, consider these modifications:
- Replace all-purpose flour with white whole wheat flour for added fiber and nutrients
- Reduce sugar to 1 1/2 cups without significantly affecting texture
- Substitute half the oil with unsweetened applesauce to cut fat content by 25%
- Use Greek yogurt instead of buttermilk for added protein
- Try a frosting made with avocado, cocoa powder, and maple syrup for a healthier topping
- For gluten-free needs, substitute a high-quality 1:1 gluten-free flour blend
These substitutions maintain the cake’s moisture and flavor while boosting its nutritional profile. The texture may be slightly different but still deliciously satisfying.
Serving Suggestions
Elevate your cake experience with these creative serving ideas:
- Pair a slice with fresh raspberries or strawberries for a bright contrast to the rich chocolate
- Serve with a scoop of vanilla bean ice cream for the ultimate hot-and-cold dessert experience
- Drizzle individual slices with warm salted caramel sauce for an extra touch of decadence
- Garnish with chocolate shavings, edible flowers, or a light dusting of cocoa powder for visual appeal
- For coffee lovers, serve alongside an espresso or cappuccino to complement the chocolate notes
- Create a dessert bar with various toppings like whipped cream, chopped nuts, and fruit compotes
For special occasions, consider adding a personalized touch with chocolate decorations or custom cake toppers that reflect the celebration’s theme.
Common Mistakes to Avoid
- Overmixing the batter – This develops gluten and creates a tough, dense cake. Mix just until ingredients are incorporated.
- Using cold ingredients – Room temperature eggs, buttermilk, and butter incorporate more evenly and create a smoother batter.
- Opening the oven door too early – This causes temperature fluctuations that can lead to a sunken center. Wait until at least 25 minutes into baking.
- Frosting a warm cake – Patience is key! Allow your cake to cool completely to avoid melted, sliding frosting.
- Inaccurate measuring – Baking is a science. For best results, use a kitchen scale rather than volume measurements for precision.
- Skipping the coffee – Even if you don’t like coffee, don’t skip this ingredient! It enhances the chocolate flavor without adding coffee taste.
Storing Tips for the Recipe
Proper storage is essential for maintaining the cake’s moisture and flavor:
- Room temperature: Store covered at room temperature for up to 3 days. An airtight cake container will keep it fresh and prevent it from absorbing other flavors.
- Refrigeration: If your kitchen is warm or if you’ve used perishable decorations, refrigerate for up to 5 days. Bring to room temperature before serving for best flavor and texture.
- Freezing: This cake freezes beautifully! Wrap unfrosted layers tightly in plastic wrap and aluminum foil, then freeze for up to 3 months. Thaw overnight in the refrigerator before frosting.
- Make ahead: Prepare cake layers up to 2 days in advance. Wrap well and store at room temperature, then frost the day of serving.
For maximum freshness, slice only what you’ll eat immediately. The cut surface can dry out quickly, so keeping the cake whole preserves moisture longer.
Conclusion
This ultimate classic chocolate cake recipe combines simplicity with spectacular results. The deep chocolate flavor, incredibly moist texture, and versatility make it perfect for any occasion, from casual family dinners to milestone celebrations.
What makes this recipe truly special is its reliability—follow these steps, and you’ll create a cake that rivals those from high-end bakeries. The balance of sweetness and rich chocolate flavor creates a dessert that appeals to everyone from chocolate connoisseurs to casual cake lovers.
Have you tried this recipe? I’d love to hear about your experience! Share your photos, variations, or questions in the comments below. And if you’re looking for more delicious chocolate treats, be sure to check out our collection of chocolate desserts that are equally impressive yet approachable.
“`