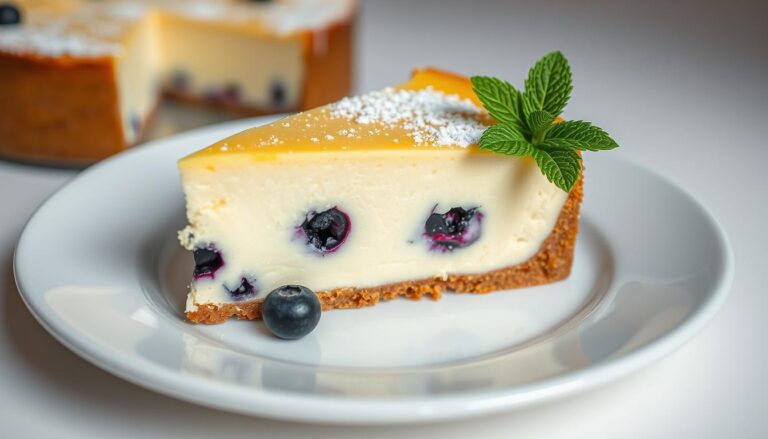
Classic New York Cheesecake Recipe
Classic New York Cheesecake Recipe: Creamy, Rich, and Absolutely Irresistible
Have you ever wondered why some New York Cheesecake recipes result in cracked tops and soggy crusts while others turn out perfectly smooth and decadent? The secret lies not just in the ingredients but in the precise techniques that transform simple components into a dessert masterpiece.
This iconic classic cheesecake has been perfected over generations in New York’s famous delis and bakeries. Today, I’m sharing a foolproof recipe that delivers that authentic dense, creamy texture and rich flavor that makes a true New York Cheesecake so special.
Whether you’re baking for a special occasion or simply craving a slice of heaven, this recipe will guide you through each step to achieve bakery-quality results in your own kitchen.
Ingredients List
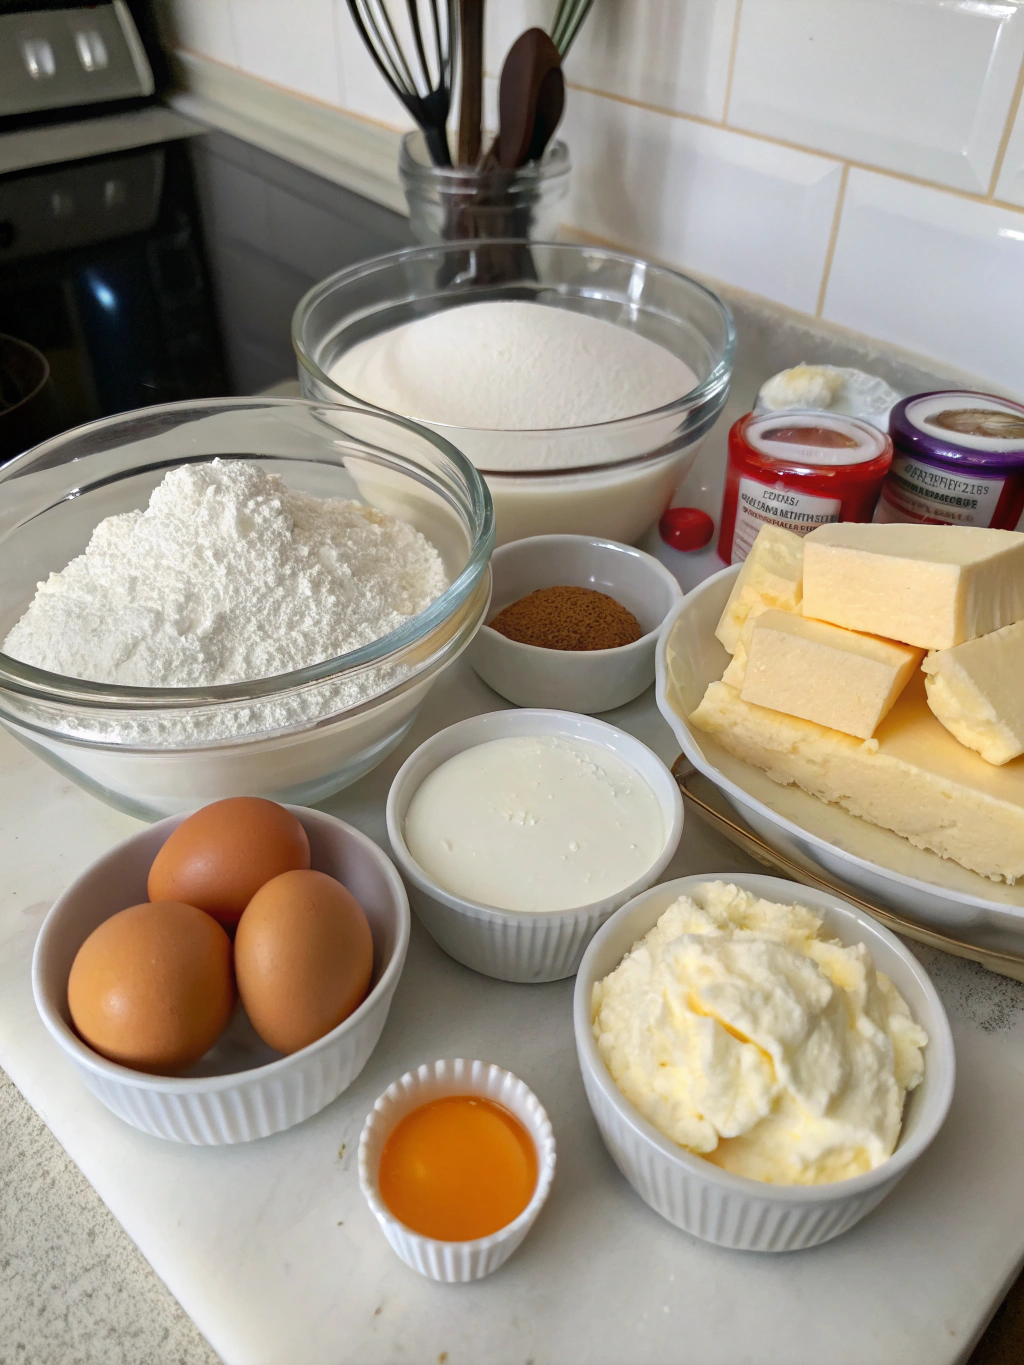
For the Graham Cracker Crust:
- 2 cups graham cracker crumbs (about 15 full sheet graham crackers)
- 1/3 cup granulated sugar
- 1/2 cup (1 stick) unsalted butter, melted
- 1/4 teaspoon salt
For the Cheesecake Filling:
- 32 oz (4 blocks) full-fat cream cheese, softened to room temperature
- 1 1/2 cups granulated sugar
- 1/3 cup sour cream, room temperature
- 2 teaspoons pure vanilla extract
- 1 teaspoon fresh lemon juice
- 5 large eggs, room temperature
- 2 tablespoons all-purpose flour
Substitution Tips: For a lighter version, you can substitute part of the cream cheese with Neufchâtel cheese. Greek yogurt can replace sour cream. For a gluten-free crust, use gluten-free graham crackers or almond flour with a touch more butter.
Timing
Preparation Time: 30 minutes
Baking Time: 1 hour 10 minutes
Cooling Time: Minimum 4 hours, preferably overnight
Total Time: 5 hours 40 minutes (25% of which is active cooking time)
This recipe requires patience, but the hands-on time is surprisingly minimal compared to other elaborate desserts. The extended cooling period is crucial for achieving that perfect texture.
Step-by-Step Instructions
Step 1: Prepare Your Equipment
Preheat your oven to 325°F (165°C). Wrap the outside of a 9-inch springform pan with a double layer of heavy-duty aluminum foil, covering the bottom and extending all the way up the sides. This waterproof barrier prevents moisture from seeping in during the water bath baking.
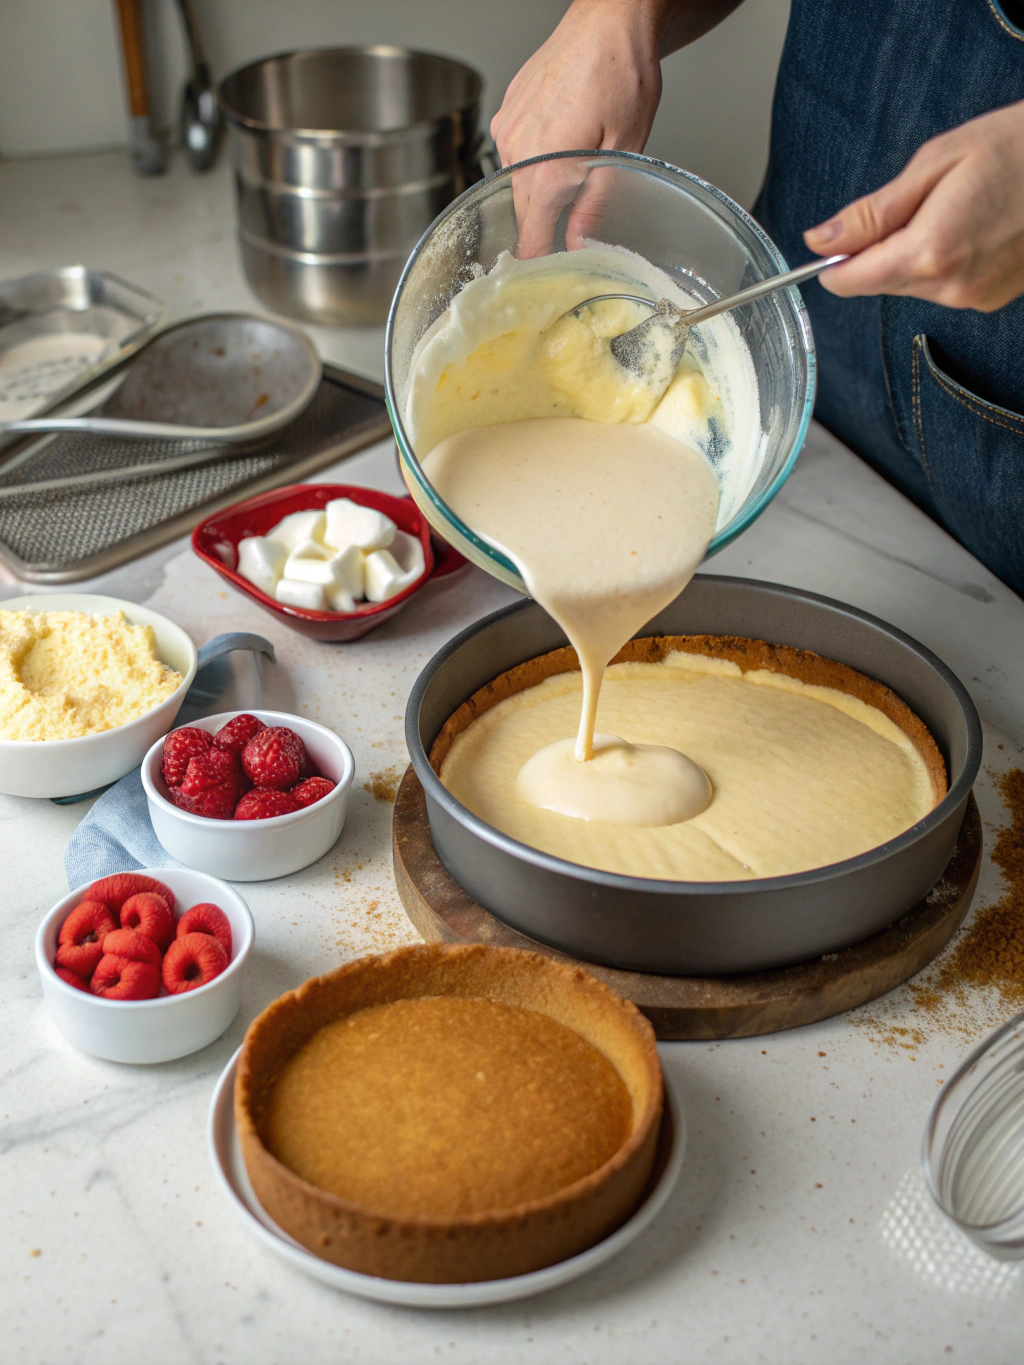
Step 2: Create the Perfect Crust
In a medium bowl, combine graham cracker crumbs, sugar, and salt. Pour in melted butter and mix until every crumb is moistened. The texture should resemble wet sand that holds together when pressed.
- Press the mixture firmly into the bottom and about 1-inch up the sides of your prepared springform pan.
- Use the flat bottom of a measuring cup to compact the crust evenly.
- Bake the crust for 10 minutes, then remove and cool on a wire rack while preparing the filling.
Step 3: Master the Filling
Reduce oven temperature to 300°F (150°C). In a large bowl using a hand mixer or in a stand mixer fitted with the paddle attachment, beat cream cheese on medium-low speed until completely smooth and free of lumps, about 4 minutes.
- Add sugar and beat for another 2 minutes until well incorporated.
- Add sour cream, vanilla extract, and lemon juice. Beat on low speed until combined.
- Add eggs, one at a time, beating on low speed after each addition just until blended. Don’t overmix!
- Sprinkle flour over the mixture and gently fold in with a rubber spatula until incorporated.
Step 4: Bake with the Water Bath Technique
Pour the creamy filling into the cooled crust. Place the foil-wrapped springform pan in a larger roasting pan. Fill the roasting pan with enough hot water to reach halfway up the sides of the springform pan.
Bake at 300°F for about 1 hour 10 minutes, or until the edges are set but the center still has a slight wobble when gently shaken. The internal temperature should reach 150°F (65°C) for perfect doneness.
Step 5: Cool Gradually to Prevent Cracks
Turn off the oven, crack the door open slightly, and let the New York Cheesecake cool in the oven for 1 hour. This gradual cooling is the secret to preventing the dreaded center crack that plagues many cheesecakes.
Remove from the oven and water bath, carefully peel away the foil, and let cool completely at room temperature for about 2 hours.
Step 6: Chill for Perfect Texture
Cover the cheesecake with plastic wrap and refrigerate for at least 4 hours, preferably overnight. This chilling time allows the flavors to meld and the texture to set into that signature dense creaminess of a true New York Cheesecake.
Nutritional Information
Per slice (based on 12 servings):
Calories: 450
Total Fat: 32g (Saturated Fat: 18g)
Cholesterol: 155mg
Sodium: 300mg
Total Carbohydrates: 35g (Dietary Fiber: 0.5g, Sugars: 28g)
Protein: 7g
This traditional recipe is indulgent by design, with the high fat content contributing to its luxurious mouthfeel. The average slice contains approximately 22% of your daily caloric intake, making it a special treat rather than an everyday dessert.
Healthier Alternatives for the Recipe
While a true New York-style cheesecake is inherently rich, you can make these modifications for a lighter version:
- Replace up to half the cream cheese with 1:1 low-fat Greek yogurt (strained overnight) to reduce fat while maintaining creaminess.
- Substitute monk fruit sweetener or erythritol for sugar to lower carbohydrate content.
- Use almond flour and coconut oil for the crust to create a grain-free, lower-carb base.
- Add a tablespoon of lemon zest to enhance flavor without additional calories.
- Consider making mini cheesecakes in a muffin tin for built-in portion control.
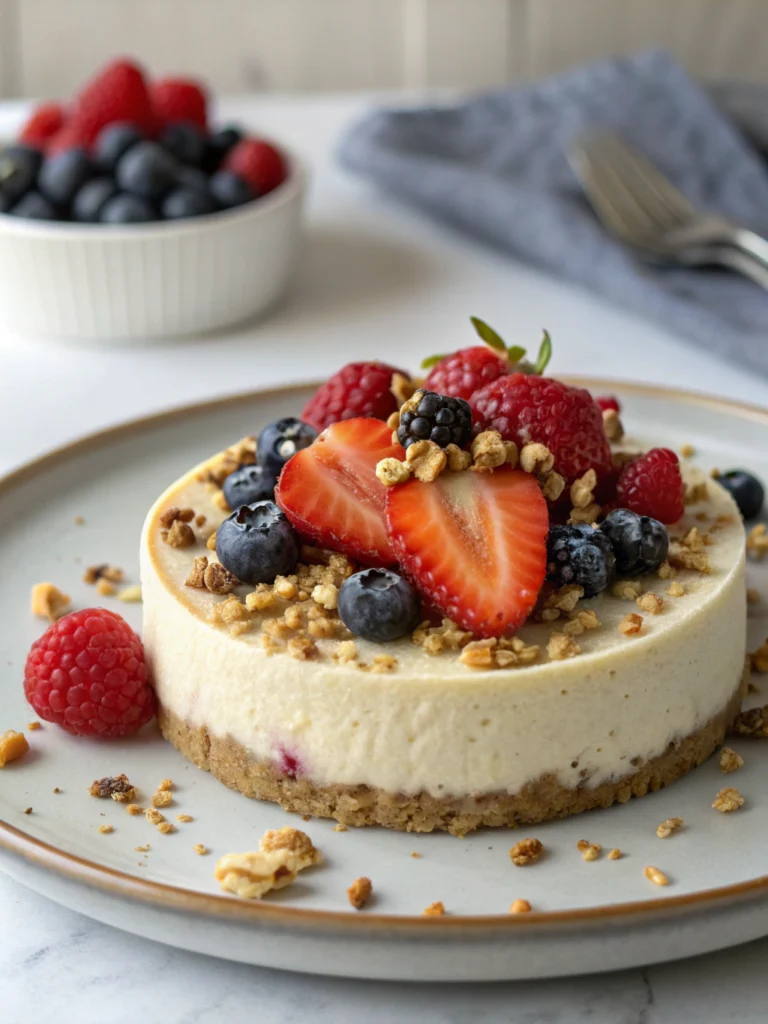
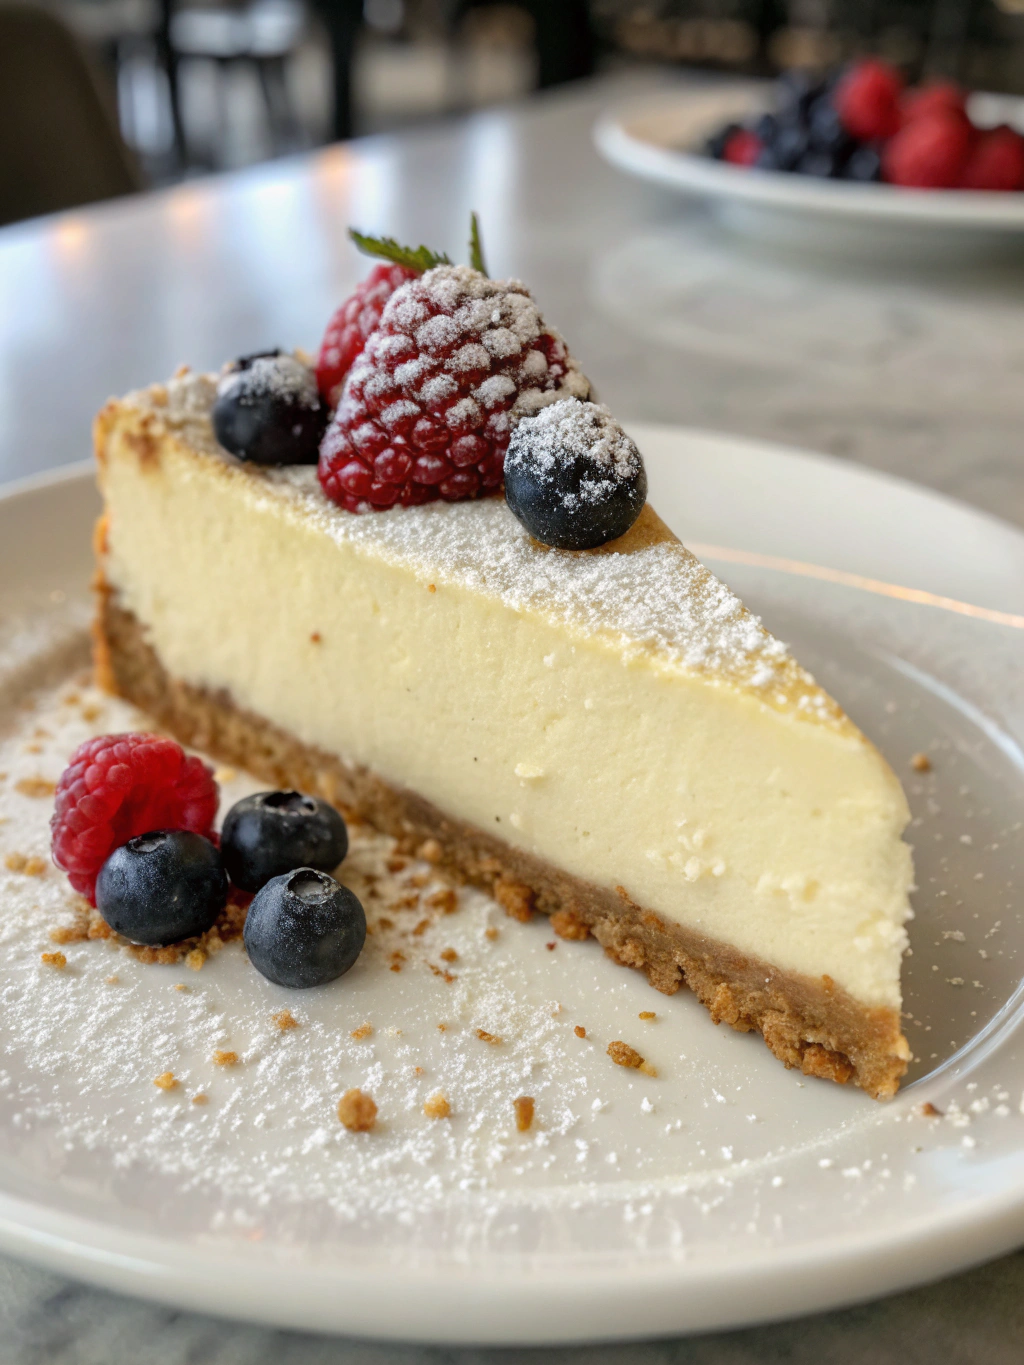
Serving Suggestions
Elevate your cheesecake experience with these complementary pairings:
- Fresh Berry Compote: Simmer mixed berries with a touch of maple syrup and lemon juice for a vibrant, antioxidant-rich topping.
- Chocolate Drizzle: A thin stream of high-quality dark chocolate adds decadence and visual appeal.
- Espresso Pairing: Serve with a shot of espresso for an elegant contrast to the cheesecake’s richness.
- Citrus Zest: A light dusting of lemon or orange zest adds brightness and visual appeal.
- Toasted Nuts: Sprinkle caramelized pecans or pistachios around the plate for textural contrast.
Common Mistakes to Avoid
- Cold Ingredients: Using refrigerator-cold cream cheese results in lumps. Always bring dairy products to room temperature (about 1 hour on the counter).
- Overmixing: Beating too much air into the batter causes the cheesecake to rise, then collapse and crack. Mix just until ingredients are incorporated.
- Skipping the Water Bath: This crucial step regulates temperature and provides humidity, preventing cracks and ensuring even baking.
- Opening the Oven Door: Sudden temperature changes cause dramatic shrinking and cracking. Resist peeking during baking!
- Rushing the Cooling Process: Quick temperature changes lead to texture issues. The gradual cooling process is non-negotiable for professional results.
Storing Tips for the Recipe
Your cheesecake will maintain peak freshness and flavor with proper storage:
- Refrigerator: Store covered with plastic wrap or in an airtight container for up to 5 days. The flavor actually improves after 24 hours as ingredients meld.
- Freezer: For longer storage, freeze the whole cheesecake or individual slices. Remove the springform sides, place on a cardboard round, and wrap tightly in plastic wrap followed by aluminum foil.
- Thawing: Thaw frozen cheesecake overnight in the refrigerator for the best texture preservation. Never microwave to thaw.
- Make-Ahead: This dessert is perfect for preparing 1-2 days before serving, making it ideal for entertaining.
Conclusion
Mastering this authentic New York Cheesecake recipe gives you a showstopping dessert that rivals any bakery creation. The key lies in respecting the process—from room temperature ingredients to the essential water bath and gradual cooling.
Have you tried this recipe? I’d love to hear about your experience in the comments below! Share your photos, variations, or questions. And if you’re looking for more classic desserts made simple, subscribe to our newsletter for weekly recipe inspiration delivered straight to your inbox.